| Main |< C & C++ switch-case-break 6 | Install Windows PSDK 2 >|Site Index |Download |
The Windows Programming
Install, Configure And Using Windows PSDK - Part 1
Items in this page:
Finding and downloading the Windows Platform Software Development Kit, PSDK.
Installing the Windows PSDK for Visual C++ 2005 Express Edition.
-
Hopefully if you already completed till worksheet #8 you could build simple C programs. Unfortunately for real applications development, most of the programming tasks are closely tied to the platforms or the operating systems (OS) for example, Windows and Linux/UNIX.
-
Here you need to understand the implementation specific of C/C++. To understand what I mean, we will try running a Win32 program using Standard C and Microsoft C. Keep in mind that the C fundamentals that you have learnt will be used with some or without any modification in order to adapt to the platform that we are targeted. And one of the reasons why many start learning programming with C/C++ is the reality that it can be used on Windows, Linux/UNIX and PowerPC platforms. Furthermore, if you already mastered C/C++ it is easier to learn other programming languages such as Java and scripting language such as PHP as well.
-
Well, let learn something useful, let hack Windows system through C programming. The term used for Windows low-level programming is Win32 that is Windows 32 bits system. Currently the Win64 already introduced, that is for 64 bits Windows system. Most of the important part of the Windows system already explored in Win32 programming tutorial using Visual C++ 6.0 and Visual C++ 2003 .Net. In this worksheet, we will try recompiling those C programs but using Visual C++ 2005 Express Edition, of course with new libraries.
-
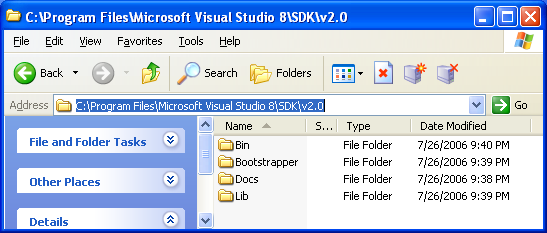
Before we can start our coding, we need to install Windows Platform Software Development Kit (PSDK or just SDK). It seems that the PSDK not bundled with VC++ EE 2005. When you check the VC++ EE 2005 installation folders, there is no SDK’s Include folder and Lib folder doesn’t have the needed .lib files as shown below.
-------------------------------------------------------------------------------------------------------------------------------------
-
If you use the full version of the VC++ 2005 or Visual Studio 2005, you can skip the following steps.
-
First of all you need to download the latest version of the SDK. The links are listed below, choose one type of download and the size is around 400++ MB.
-
For no. 3, if needed, you may rename the .IMG extension to .ISO. If you want to get an idea how to install/extract the .IMG/.ISO files, go to this link and the steps how to configure the PSDK after the installation is dump here or here. However Tenouk will show to you how to install, configure and test the PSDK shortly.
-
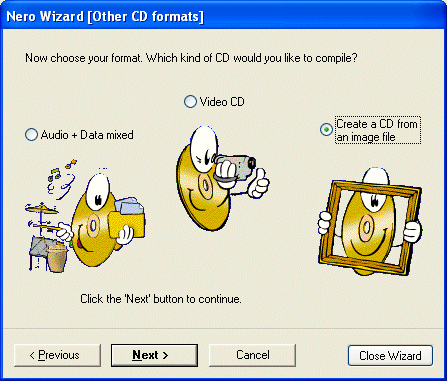
For this worksheet practice, Tenouk downloaded the ISO image version of the SDK because it will be used to install the SDK on many other students’ computers. After downloaded the IMG/ISO file, Tenouk burn it on the CD using Nero. Make sure you create the CD from an image file (the image file will be automatically uncompressed while burning the CD). For example by using Nero you will find the Create a CD from an image file menu as shown below.
-
When the image file has been burned on the CD successfully, you can see the following uncompressed folders and files.

-
Next we are ready to do the installation.
-
The following Figure shows several versions of the Visual C++ compilers that already installed on Tenouk’s Windows XP Pro SP2 machine. Here we have Visual Studio .Net 2003 and Visual C++ 2005 Express Edition. Yours should be different. We need to know this in order to properly configure the PSDK later.
--------------------------------------------------

-
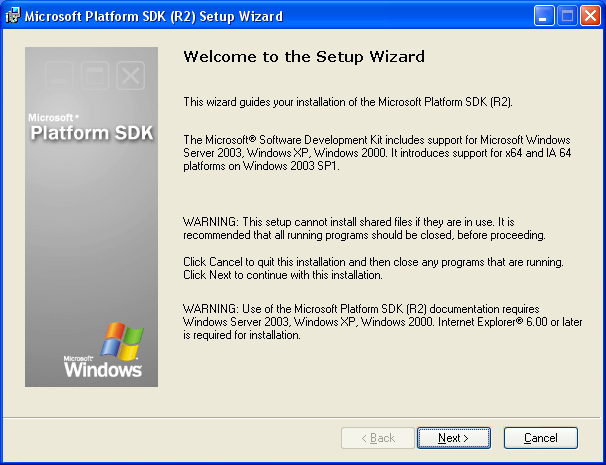
When the ISO/IMG CD inserted into the CD drive the Autorun will start and the following Welcome dialog will be displayed. If your CD drive not configure to auto run, double click the Setup.Exe file. Click the Next button.
-
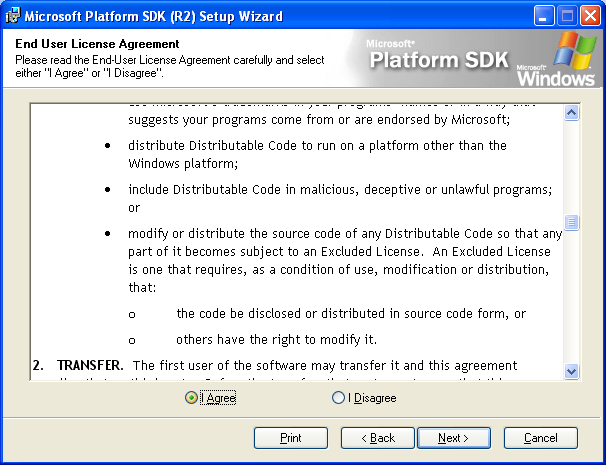
Select the I Agree radio button and click the Next button.
-
Here we will choose the Typical installation. Select the Typical radio button.

-
If you want to customize your PSDK installation, please choose the Custom installation. The following several steps just to explore what items that we can customize during the PSDK installation. Select the Custom radio button and click the Next button.

|
|
|

-
The following shows the PSDK component that need to be selected or deselected. So, the Custom installation is intended for the experienced or expert person. In Tenouk practice, what we need just the Microsoft Windows Core SDK components.

| Main |< C & C++ switch-case-break 6 | Install Windows PSDK 2 >|Site Index |Download |
Windows SDK-Download, Install, Configure and Use:Part 1 |Part 2 |Part 3 |Part 4