| Tenouk C & C++ | MFC Home | C++, MFC, Winsock & WinInet 2 | C++, MFC, Winsock & WinInet 4 | Download | Site Index |
C++, MFC, Winsock and WinInet Part 3
Program examples compiled using Visual C++ 6.0 compiler on Windows XP Pro machine with Service Pack 2 and some Figure screen snapshots have been taken on Windows 2000 server. Topics and sub topics for this tutorial are listed below. Don’t forget to read Tenouk’s small disclaimer. Supplementary item is WEBSITE.
-
Building a Web Server with CHttpBlockingSocket
-
MYEX33A Server Limitations
-
MYEX33A Server Architecture
-
Using the Win32 TransmitFile() Function
-
Building MYEX33A From Scratch
|
Building a Web Server with CHttpBlockingSocket
If you need a Web server, your best bet is to buy one or to use the Microsoft Internet Information Server (IIS) that comes bundled with Windows NT/2000/2003 Server. Of course, you'll learn more if you build your own server and you'll also have a useful diagnostic tool. And what if you need features that IIS can't deliver? Suppose you want to add Web server capability to an existing Windows application, or suppose you have a custom ActiveX control that sets up its own non-HTTP TCP connection with the server. Take a good look at the server code in MYEX33A, which works under Windows NT, Windows 95, and Windows 98. It might work as a foundation for your next custom server application.
MYEX33A Server Limitations
The server part of the MYEX33A program honors GET requests for files, and it has logic for processing POST requests. (POST requests are described in Module 33.) These are the two most common HTTP request types. MYEX33A will not, however, launch Common Gateway Interface (CGI) scripts or load Internet Server Application Programming Interface (ISAPI) DLLs. You'll learn more about ISAPI in Module 35.) MYEX33A makes no provision for security, and it doesn't have FTP capabilities. Other than that, it's a great server! If you want the missing features, just write the code for them yourself.
MYEX33A Server Architecture
You'll soon see that MYEX33A combines an HTTP server, a Winsock HTTP client, and two WinInet HTTP clients. All three clients can talk to the built-in server or to any other server on the Internet. Any client program, including the Telnet utility and standard browsers such as Microsoft Internet Explorer, can communicate with the MYEX33A server. You'll examine the client sections a little later in this module. MYEX33A is a standard MFC SDI document-view application with a view class derived from CEditView. The main menu includes Start Server and Stop Server menu choices as well as a Configuration command that brings up a tabbed dialog for setting the home directory, the default file for blind GETs, and the listening port number (default is 80). The Start Server command handler starts a global socket listening and then launches a thread, as in the simplified HTTP server described previously. Look at the ServerThreadProc() function included in the file ServerThread.cpp of the MYEX33A project. Each time a server thread processes a request, it logs the request by sending a message to the CEditView window. It also sends messages for exceptions, such as bind errors. The primary job of the server is to deliver files. It first opens a file, storing a CFile pointer in pFile, and then it reads 10 KB (SERVERMAXBUF) blocks and writes them to the socket sConnect, as shown in the code below: |
|
char* buffer = new char[SERVERMAXBUF];
DWORD dwLength = pFile->GetLength();
nBytesSent = 0;
DWORD dwBytesRead = 0;
UINT uBytesToRead;
while(dwBytesRead < dwLength) {
uBytesToRead = min(SERVERMAXBUF, dwLength - dwBytesRead);
VERIFY(pFile->Read(buffer, uBytesToRead) == uBytesToRead);
nBytesSent += sConnect.Write(buffer, uBytesToRead, 10);
dwBytesRead += uBytesToRead;
}
The server is programmed to respond to a GET request for a phony file named Custom. It generates some HTML code that displays the client's IP address, port number, and a sequential connection number. This is one possibility for server customization. The server normally listens on a socket bound to address INADDR_ANY. This is the server's default IP address determined by the Ethernet board or assigned during your connection to your ISP. If your server computer has several IP addresses, you can force the server to listen to one of them by filling in the Server IP Address in the Advanced Configuration page. You can also change the server's listening port number on the Server page. If you choose port 90, for example, browser users would connect to https://localhost:90 but make sure the port that you select does not conflict with the well known ports. The leftmost status bar indicator pane displays "Listening " when the server is running.
Using the Win32 TransmitFile() Function
If you have Windows NT 4.0 and above, you can make your server more efficient by using the Win32 TransmitFile() function in place of the CFile::Read loop in the code excerpt shown. TransmitFile() sends bytes from an open file directly to a socket and is highly optimized. The MYEX33A ServerThreadProc() function contains the following line:
if (::TransmitFile(sConnect, (HANDLE) pFile >m_hFile, dwLength, 0, NULL, NULL, TF_DISCONNECT))
If you have Windows NT, uncomment the line:
#define USE_TRANSMITFILE
at the top of ServerThread.cpp to activate the TransmitFile() logic.
Building MYEX33A From Scratch
Well, before we dig deeper, let build MYMFC33A project from scratch. As usual, select New Project in Visual C++ and follow the shown steps.

Figure 10: MYEX33A – Visual C++ New project dialog.

Figure 11: MYEX33A – AppWizard step 1 of 6, SDI project.
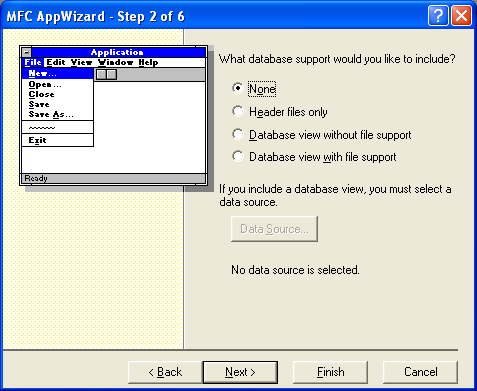
Figure 12: MYEX33A – AppWizard step 2 of 6.
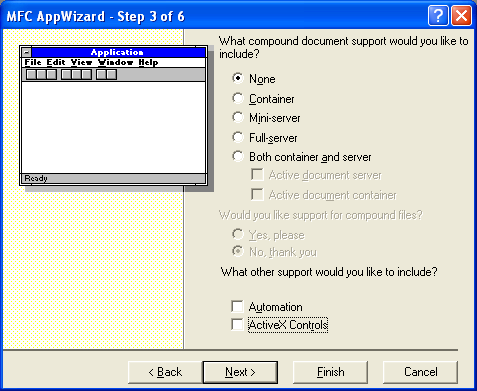
Figure 13: MYEX33A – AppWizard step 3 of 6, de-select Automation and ActiveX Controls.
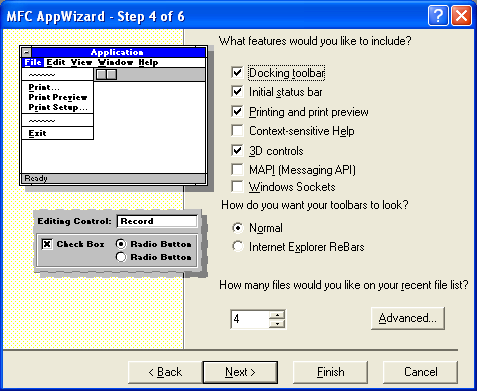
Figure 14: MYEX33A – AppWizard step 4 of 6, we will use a normal dialog to create an address bar.
----------------------------------------------------------------------------------------------
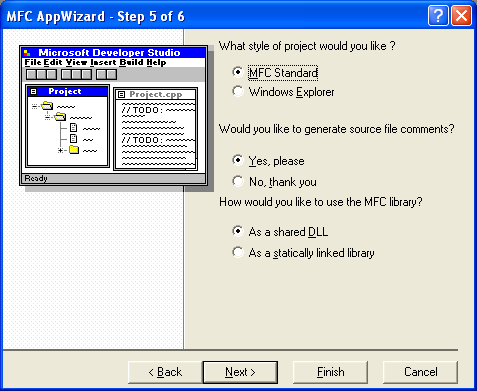
Figure 15: MYEX33A – AppWizard step 5 of 6.
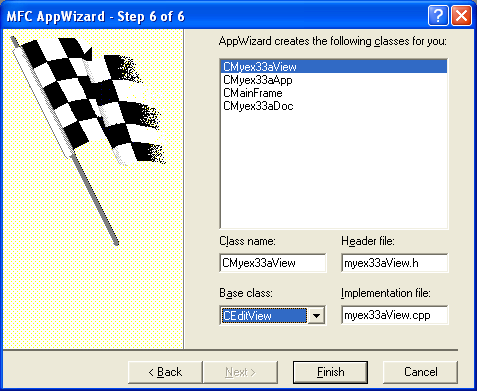
Figure 16: MYEX33A – AppWizard step 6 of 6, selecting CEditView as the view base class.
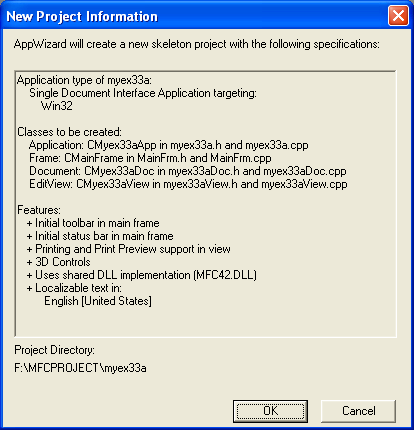
Figure 17: MYEX33A project summary.
First of all let add the project resources. In ResourceView, add new dialog, rename the ID to IDD_DIALOGBAR. In Styles tab, de-select the Title bar option, select Child for Style and None for Border. Add Static text, Edit and Button controls as shown below. Follow the shown steps.
|
Control/resource |
ID |
Caption/Text |
|
Dialog |
IDD_DIALOGBAR |
- |
|
Static text |
Default |
Address: |
|
Edit control |
IDC_URL |
- |
|
Button |
IDC_REQUEST |
URL Request |
|
Table 16. |
||
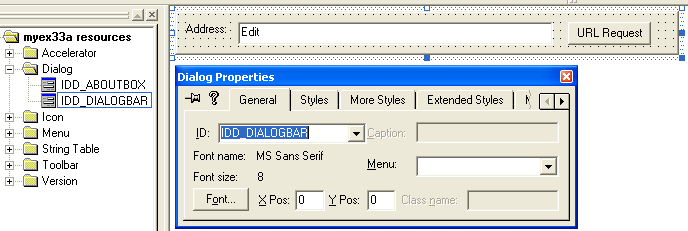
Figure 18: IDD_DIALOGBAR property page.

Figure 19: Setting dialog’s Styles and Border properties.
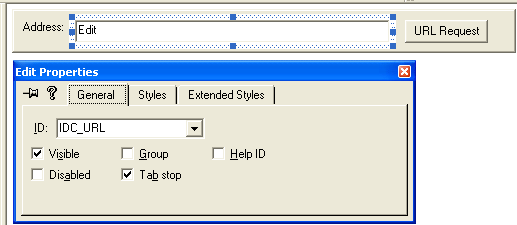
Figure 20: The IDC_URL property.

Figure 21: The IDC_REQUEST property.
Add another three dialogs for the property page of the Configuration menu. Firstly add IDD_PROPPAGE_ADV, for the advanced page settings and the following controls. Follow the shown steps.
|
Control/resource |
ID |
Caption/Text |
|
Dialog |
IDD_PROPPAGE_ADV |
Advanced |
|
Static text |
Default |
Server IP Address: |
|
Edit control |
IDC_IPSERVER |
- |
|
Static text |
Default |
Client IP Address: |
|
Edit control |
IDC_IPCLIENT |
- |
|
Static text |
Default |
Static text - Use these fields ONLY if your computer supports multiple IP addresses. The client IP address applies to WinSock client ONLY. |
|
Table 17. |
||
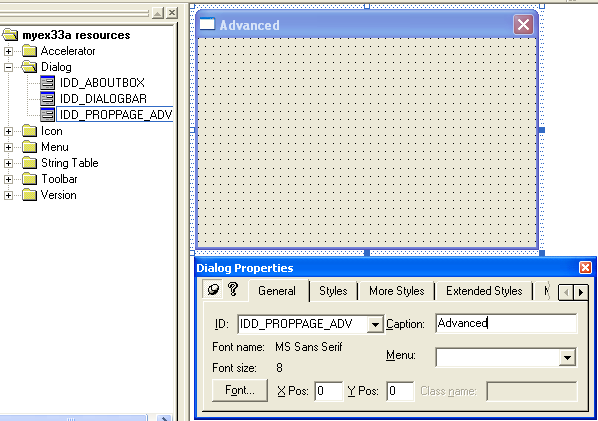
Figure 22: The IDD_PROPPAGE_ADV property.
|
Figure 23: The IDC_IPSERVER property. |


Figure 24: The IDC_IPCLIENT property.
Add new dialog, IDD_PROPPAGE_CLIENT, the client settings property page and the following controls. Follow the shown steps.
|
Control/resource |
ID |
Caption/Text |
|
Dialog |
IDD_PROPPAGE_CLIENT |
Client |
|
Static text |
Default |
Server Name: |
|
Edit control |
IDC_SERVER |
- |
|
Static text |
Default |
Server IP Addr: |
|
Edit control |
IDC_IPADDR |
- |
|
Static text |
Default |
Port: |
|
Edit control |
IDC_PORT |
- |
|
Static text |
Default |
Server File: |
|
Edit control |
IDC_FILE |
- |
|
Tick box |
IDC_USEPROXY |
Use Web Proxy |
|
Static text |
Default |
Proxy Server: |
|
Edit control |
IDC_PROXY |
- |
|
Static text |
Default |
Specify either a name or IP address but not both. Server name and IP address apply to both the WinSock and WinInet clients. The Proxy fields apply only to the WinSock client. WinInet client reads registry for proxy information. |
|
Table 18. |
||
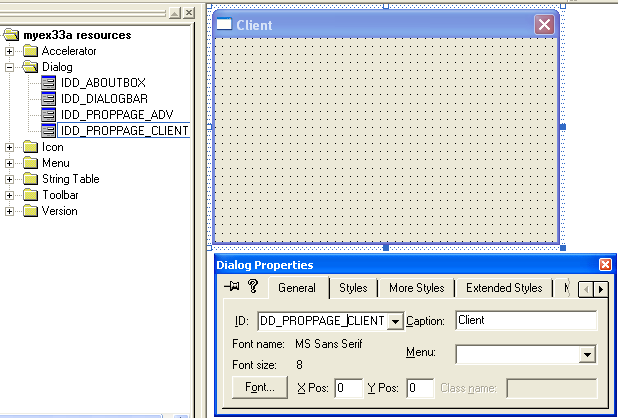
Figure 25: The IDD_PROPPAGE_CLIENT property.
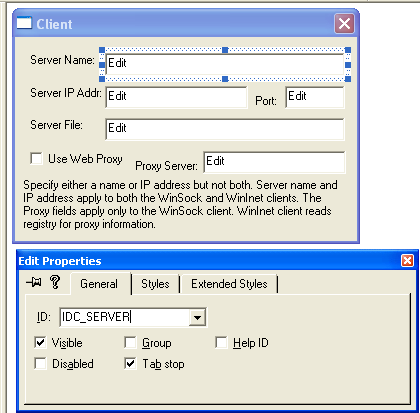
Figure 26: The IDC_SERVER property.
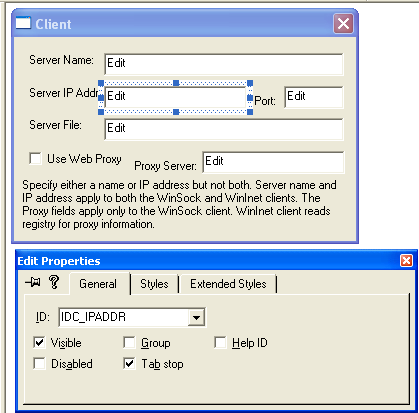
Figure 27: The IDC_IPADDR property.
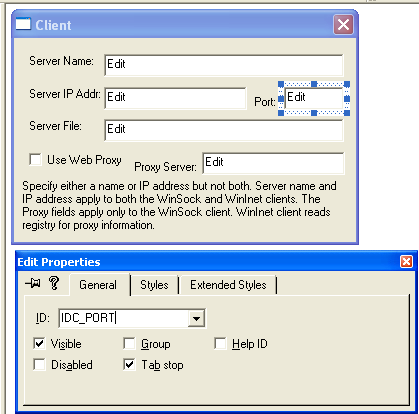
Figure 28: The IDC_PORT property.

Figure 29: The IDC_FILE property.
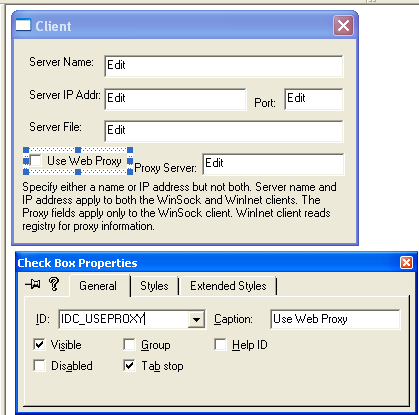
Figure 30: The IDC_USEPROXY property.

Figure 31: The IDC_PROXY property.
Add new dialog and the following controls for server settings property page. Follow the shown steps.
|
Control/resource |
ID |
Caption/Text |
|
Dialog |
IDD_PROPPAGE_SERVER |
Server |
|
Static text |
Default |
Home Directory: |
|
Edit control |
IDC_DIRECT |
- |
|
Static text |
Default |
Default File: |
|
Edit control |
IDC_DEFAULT |
- |
|
Static text |
Default |
Listening Port: |
|
Edit control |
IDC_PORTSERVER |
- |
|
Table 19. |
||
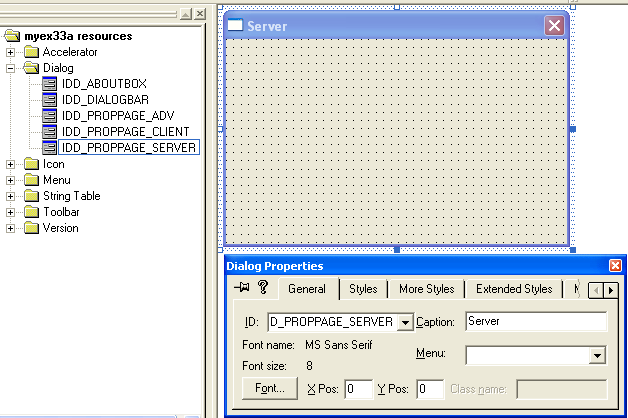
Figure 32: The IDD_PROPPAGE_SERVER property.
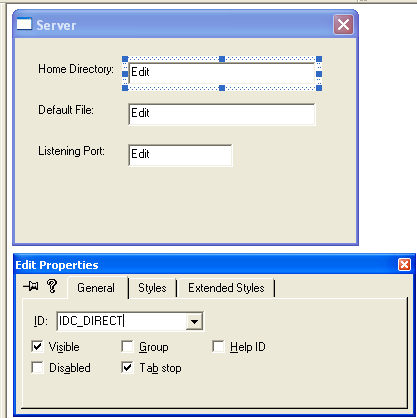
Figure 33: The IDC_DIRECT property.
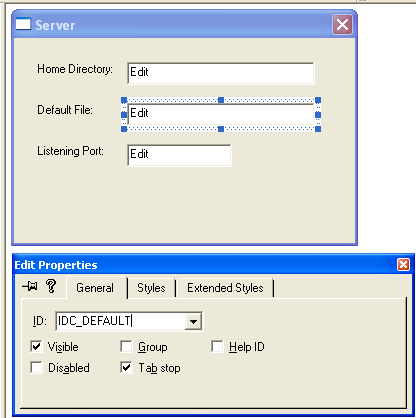
Figure 34: The IDC_DEFAULT property.
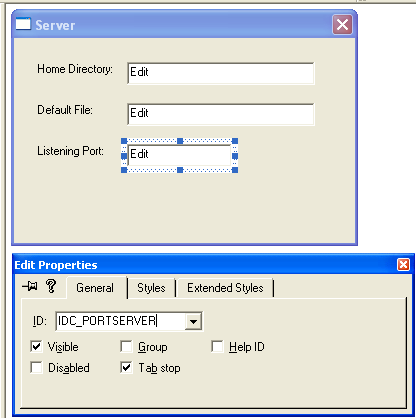
Figure 35: The IDC_PORTSERVER property.
Continue on next Module...
Further reading and digging:
-
Win32 process, thread and synchronization story can be found starting from Module R.
-
DCOM at MSDN.
-
COM+ at MSDN.
-
COM at MSDN.
-
Unicode and Multi-byte character set: Story and program examples.