| Tenouk C & C++ | MFC Home | Menus, Key Acc., Rich Edit & Property Sheets 3 | Toolbars, Status Bars & ReBar 1 | Download | Site Index |
Module 7(a)two: Menus, Keyboard Accelerators, the Rich Edit Control,
and Property Sheets – Part 4
This is a continuation from the previous module... Program examples compiled using Visual C++ 6.0 (MFC 6.0) compiler on Windows XP Pro machine with Service Pack 2. Topics and sub topics for this Tutorial are listed below:
-
Apply Button Processing
-
The CMenu Class
-
Creating Floating Pop-Up Menus
-
Extended Command Processing
|
|
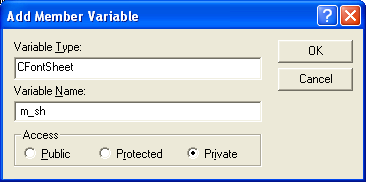
Add two data members and two prototypes to the CMymfcproView class.
private: CFontSheet m_sh; BOOL m_bDefault; // TRUE default format, FALSE selection
Figure 17: Adding m_sh member variable.
Figure 18: Adding m_bDefault member variables.
|

If you use ClassView for the data members, the #include for Property.h will be added automatically as shown below.

Listing 2.
Now add the prototype for the private function Format:
private:
void Format(CHARFORMAT &cf);
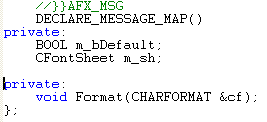
Listing 3.
Insert the prototype for the protected function OnUserApply() before the DECLARE_MESSAGE_MAP macro.
afx_msg LRESULT OnUserApply(WPARAM wParam, LPARAM lParam);
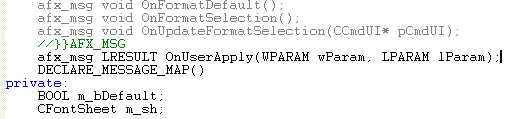
Listing 4.
Edit and add code in the file mymfcproView.cpp. Map the user-defined WM_USERAPPLY message, as shown here:
ON_MESSAGE(WM_USERAPPLY, OnUserApply)
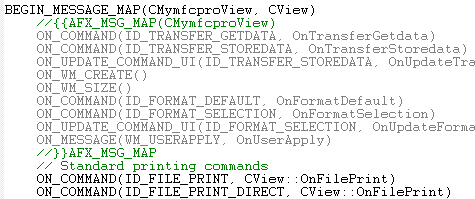
Listing 5.
Add the following lines to the OnCreate() function, just before the return 0 statement:
CHARFORMAT cf;
Format(cf);
m_rich.SetDefaultCharFormat(cf);
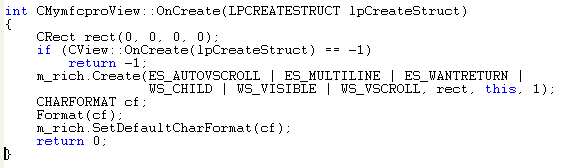
Listing 6.
Edit the view constructor to set default values for the property sheet data members, as follows:
CMymfcproView::CMymfcproView() : m_sh("")
{
m_sh.m_page1.m_nFont = 0;
m_sh.m_page2.m_bBold = FALSE;
m_sh.m_page2.m_bItalic = FALSE;
m_sh.m_page2.m_bUnderline = FALSE;
m_sh.m_page3.m_nColor = 0;
m_sh.m_page4.m_nFontSize = 12;
g_pView = this;
m_bDefault = TRUE;
}
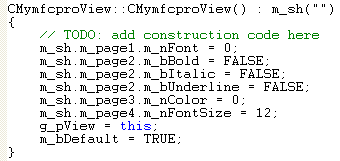
Listing 7.
Edit the format command handlers, as shown here:
void CMymfcproView::OnFormatDefault()
{
m_sh.SetTitle("Default Format");
m_bDefault = TRUE;
m_sh.DoModal();
}
void CMymfcproView::OnFormatSelection()
{
m_sh.SetTitle("Selection Format");
m_bDefault = FALSE;
m_sh.DoModal();
}
void CMymfcproView::OnUpdateFormatSelection(CCmdUI* pCmdUI)
{
long nStart, nEnd;
m_rich.GetSel(nStart, nEnd);
pCmdUI->Enable(nStart != nEnd);
}
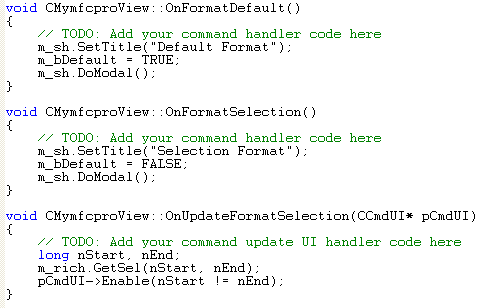
Listing 8.
Add the following handler for the user-defined WM_USERAPPLY message:
LRESULT CMymfcproView::OnUserApply(WPARAM wParam, LPARAM lParam)
{
TRACE("CMymfcproView::OnUserApply -- wParam = %x\n", wParam);
CHARFORMAT cf;
Format(cf);
if (m_bDefault)
{
m_rich.SetDefaultCharFormat(cf);
}
else
{
m_rich.SetSelectionCharFormat(cf);
}
return 0;
}
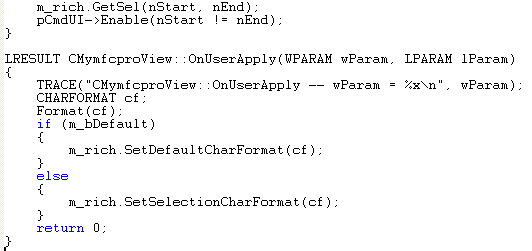
Listing 9.
Add the Format() helper function, as shown below, to set a CHARFORMAT structure based on the values of the property sheet data members.
void CMymfcproView::Format(CHARFORMAT& cf)
{
cf.cbSize = sizeof(CHARFORMAT);
cf.dwMask = CFM_BOLD | CFM_COLOR | CFM_FACE |
CFM_ITALIC | CFM_SIZE | CFM_UNDERLINE;
cf.dwEffects = (m_sh.m_page2.m_bBold ? CFE_BOLD : 0) |
(m_sh.m_page2.m_bItalic ? CFE_ITALIC : 0) |
(m_sh.m_page2.m_bUnderline ? CFE_UNDERLINE : 0);
cf.yHeight = m_sh.m_page4.m_nFontSize * 20;
switch(m_sh.m_page3.m_nColor) {
case -1:
case 0:
cf.crTextColor = RGB(0, 0, 0);
break;
case 1:
cf.crTextColor = RGB(255, 0, 0);
break;
case 2:
cf.crTextColor = RGB(0, 255, 0);
break;
}
switch(m_sh.m_page1.m_nFont) {
case -1:
case 0:
strcpy(cf.szFaceName, "Times New Roman");
break;
case 1:
strcpy(cf.szFaceName, "Arial");
break;
case 2:
strcpy(cf.szFaceName, "Courier New");
break;
}
cf.bCharSet = 0;
cf.bPitchAndFamily = 0;
}
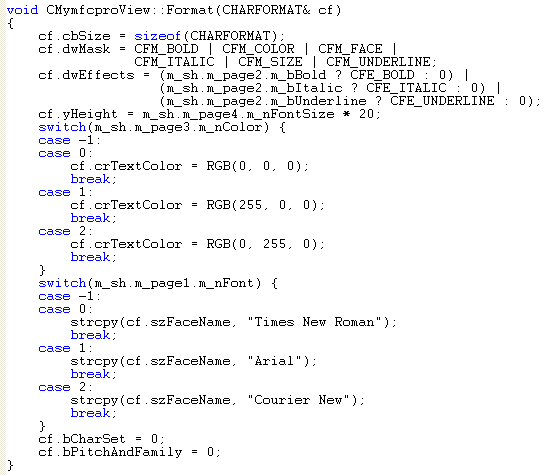
Listing 10.
Build and test the enhanced MYMFCPRO application. Type some text, and then choose Default from the Format menu.
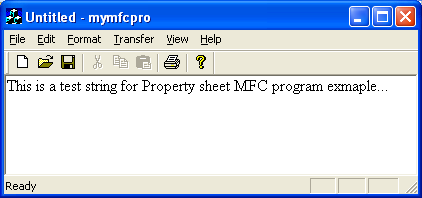
Figure 19: The new MYMFCPRO program output with property sheet.
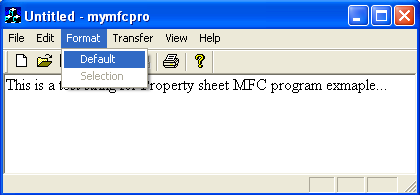
Figure 20: MYMFCPRO program output with Default and Selection menus.
|
Figure 21: Setting the text’s font, effects, color and size through property sheets. |
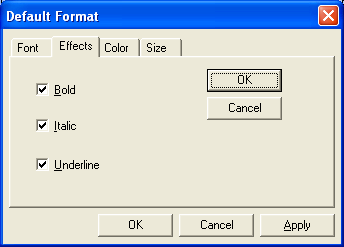
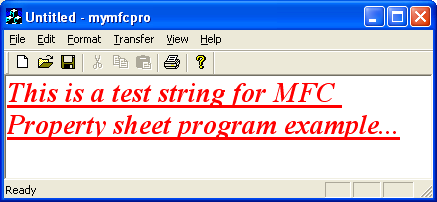
Figure 22: MYMFCPRO program output with property sheet in action.
Observe the TRACE messages in the Debug window as you click on property sheet tabs and click the Apply button. Try highlighting some text and then formatting the selection.
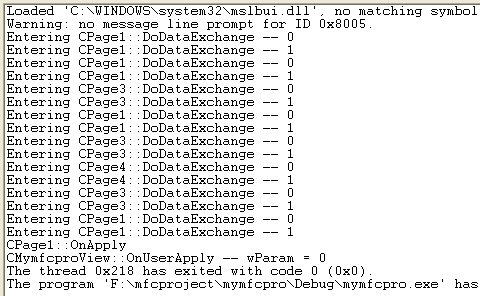
Figure 23: Viewing MYMFCPRO debug information (TRACE) through the debug window.
Apply Button Processing
You might be curious about the way the property sheet classes process the Apply button. In all the page classes, the overridden OnCommand() functions enable the Apply button whenever a control sends a message to the page. This works fine for pages 1 through 3 in MYMFCPRO, but for page 4, OnCommand() is called during the initial conversation between the spin button control and its buddy. The OnApply() virtual override in the CPage1 class sends a user-defined message to the view. The function finds the view in an expedient way, by using a global variable set by the view class. A better approach would be to pass the view pointer to the sheet constructor and then to the page constructor. The view class calls the property sheet's DoModal() function for both default formatting and selection formatting. It sets the m_bDefault flag to indicate the mode. We don't need to check the return from DoModal() because the user-defined message is sent for both the OK button and the Apply button. If the user clicksCancel, no message is sent.
The CMenu Class
Up to this point, the application framework and the menu editor have shielded you from the menu class, CMenu. A CMenu object can represent each Windows menu, including the top-level menu items and associated pop-up menus. Most of the time, the menu's resource is directly attached to a frame window when the window's Create() or LoadFrame() function is called, and a CMenu object is never explicitly constructed. The CWnd member function GetMenu() returns a temporary CMenu pointer. Once you have this pointer, you can freely access and update the menu object.
Suppose you want to switch menus after the application starts. IDR_MAINFRAME always identifies the initial menu in the resource script. If you want a second menu, you use the menu editor to create a menu resource with your own ID. Then, in your program, you construct a CMenu object, use the CMenu::LoadMenu function to load the menu from the resource, and call the CWnd::SetMenu function to attach the new menu to the frame window. Then you call the Detach member function to separate the object's HMENU handle so that the menu is not destroyed when the CMenu object goes out of scope.
You can use a resource to define a menu, and then your program can modify the menu items at runtime. If necessary, however, you can build the whole menu at runtime, without benefit of a resource. In either case, you can use CMenu member functions such as ModifyMenu(), InsertMenu(), and DeleteMenu(). Each of these functions operates on an individual menu item identified by ID or by a relative position index. A menu object is actually composed of a nested structure of submenus. You can use the GetSubMenu() member function to get a CMenu pointer to a pop-up menu contained in the main CMenu object. The CMenu::GetMenuString function returns the menu item string corresponding to either a zero-based index or a command ID. If you use the command ID option, the menu is searched, together with any submenus.
Creating Floating Pop-Up Menus
For the floating pop-up menus the user presses the right mouse button and a floating menu offers choices that relate to the current selection. It's easy to create these menus using the resource editor and the MFC library CMenu::TrackPopupMenu function. Just follow these steps:
Use the menu editor to insert a new, empty menu in your project's resource file.

Figure 24: Inserting new menu for floating pop-up menus.
Type some characters in the left top-level item, and then add your menu items in the resulting pop-up menu.
---------------------------------------------------------------------------------
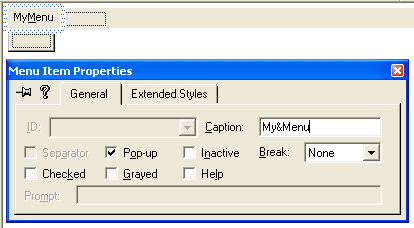
Figure 25: Adding and modifying new pop-up menu properties.
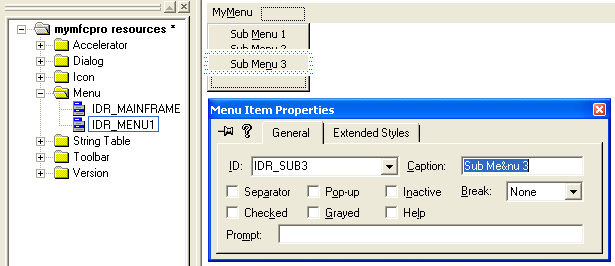
Figure 26: Adding and modifying floating pop-up menu items.
Use ClassWizard to add a WM_CONTEXTMENU message handler in your view class or in some other window class that receives mouse-click messages.
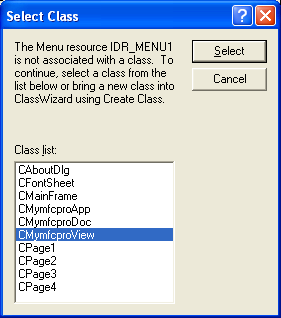
Figure 27: Adding a WM_CONTEXTMENU message handler in the view class.
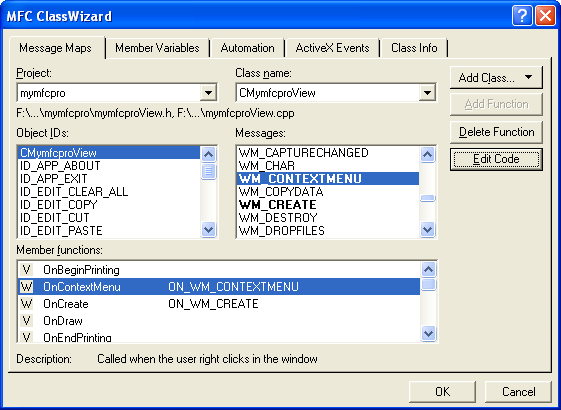
Figure 28: Mapping a message to the view class.
Code the handler as shown below.
void CMymfcproView::OnContextMenu(CWnd* pWnd, CPoint point)
{
// TODO: Add your message handler code here
CMenu menu;
// menu.LoadMenu(IDR_MYFLOATINGMENU);
menu.LoadMenu(IDR_MENU1);
menu.GetSubMenu(0)->TrackPopupMenu(TPM_LEFTALIGN | TPM_RIGHTBUTTON, point.x, point.y, this);
}
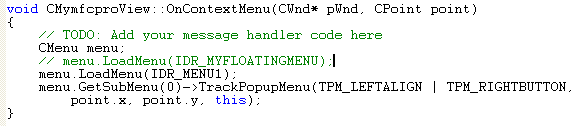
Listing 11.
You can use ClassWizard to map the floating menu's command IDs the same way you would map the frame menu's command IDs. Build and run the MYMFCPRO.
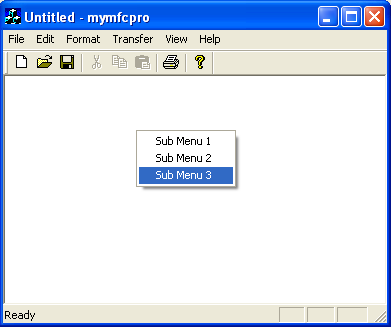
Figure 29: MYMFCPRO program output with floating pop-up menu.
Extended Command Processing
In addition to the ON_COMMAND message map macro, the MFC library provides an extended variation, ON_COMMAND_EX. The extended command message map macro provides two features not supplied by the regular command message, a command ID function parameter and the ability to reject a command at runtime, sending it to the next object in the command route. If the extended command handler returns TRUE, the command goes no further; if it returns FALSE, the application framework looks for another command handler.
The command ID parameter is useful when you want one function to handle several related command messages. You might invent some of your own uses for the rejection feature. ClassWizard can't help you with extended command handlers, so you'll have to do the coding yourself, outside the AFX_MSG_MAP brackets. Assume that IDM_ZOOM_1 and IDM_ZOOM_2 are related command IDs defined in resource.h. Here's the class code you'll need to process both messages with one function, OnZoom():
BEGIN_MESSAGE_MAP(CMyView, CView)
ON_COMMAND_EX(IDM_ZOOM_1, OnZoom)
ON_COMMAND_EX(IDM_ZOOM_2, OnZoom)
END_MESSAGE_MAP()
BOOL CMyView::OnZoom(UINT nID)
{
if (nID == IDM_ZOOM_1) {
// code specific to first zoom command
}
else {
// code specific to second zoom command
}
// code common to both commands
return TRUE; // Command goes no further
}
Here's the function prototype:
afx_msg BOOL OnZoom(UINT nID);
Other MFC message map macros are helpful for processing ranges of commands, as you might see in dynamic menu applications. These macros include:
ON_COMMAND_RANGE
ON_COMMAND_EX_RANGE
ON_UPDATE_COMMAND_UI_RANGE
If the values of IDM_ZOOM_1 and IDM_ZOOM_2 were consecutive, you could rewrite the CMyView message map as follows:
BEGIN_MESSAGE_MAP(CMyView, CView)
ON_COMMAND_EX_RANGE(IDM_ZOOM_1, IDM_ZOOM_2, OnZoom)
END_MESSAGE_MAP()
Now OnZoom() is called for both menu choices, and the handler can determine the choice from the integer parameter.
Further reading and digging:
-
DCOM at MSDN.
-
COM+ at MSDN.
-
COM at MSDN.
-
Unicode and Multi-byte character set: Story and program examples.