| Tenouk C & C++ | MFC Home | Bitmaps 3 | Bitmaps 5 | Download | Site Index |
Module 21c: The Bitmaps 4
This is a continuation from the previous module... Program examples compiled using Visual C++ 6.0 (MFC 6.0) compiler on Windows XP Pro machine with Service Pack 2. Topics and sub topics for this Tutorial are listed below:
-
The CDib Class ...a continuation...
-
DIB Display Performance
-
The MYMFC26C Example
|
Here's a rundown of the CDib member functions, starting with the constructors and the destructor:
|
|
||||||||||||||||||
|
Parameter |
Description |
|
lpvMem |
Address of the memory to be attached. |
|
bMustDelete |
Flag that is TRUE if the CDib class is responsible for deleting this memory; the default value is FALSE. |
|
hGlobal |
If memory was obtained with a call to the Win32 GlobalAlloc() function, the CDib object needs to keep the handle in order to free it later, assuming that bMustDelete was set to TRUE. |
|
Return value |
TRUE if successful. |
|
Table 3. |
|
-
Compress(): This function regenerates the DIB as a compressed or an uncompressed DIB. Internally, it converts the existing DIB to a GDI bitmap and then makes a new compressed or an uncompressed DIB. Compression is supported only for 4-bpp and 8-bpp DIBs. You can't compress a DIB section.
|
Parameter |
Description |
|
pDC |
Pointer to the display device context. |
|
bCompress |
TRUE (default) to compress the DIB; FALSE to uncompress it. |
|
Return value |
TRUE if successful. |
|
Table 4. |
|
-
CopyToMapFile(): This function creates a new memory-mapped file and copies the existing CDib data to the file's memory, releasing any previously allocated memory and closing any existing memory-mapped file. The data isn't actually written to disk until the new file is closed, but that happens when the CDib object is reused or destroyed.
|
Parameter |
Description |
|
strPathname |
Pathname of the file to be mapped. |
|
Return value |
TRUE if successful. |
|
Table 5. |
|
-
CreateBitmap(): This function creates a GDI bitmap from an existing DIB and is called by the Compress() function. Don't confuse this function with CreateSection(), which generates a DIB and stores the handle.
|
Parameter |
Description |
|
pDC |
Pointer to the display or printer device context. |
|
Return value |
Handle to a GDI bitmap, NULL if unsuccessful. This handle is not stored as a public data member. |
|
Table 6. |
|
-
CreateSection(): This function creates a DIB section by calling the Win32 CreateDIBSection() function. The image memory will be uninitialized.
|
Parameter |
Description |
|
pDC |
Pointer to the display or printer device context. |
|
Return value |
Handle to a GDI bitmap, NULL if unsuccessful. This handle is also stored as a public data member. |
|
Table 7. |
|
-
Draw(): This function outputs the CDib object to the display (or to the printer) with a call to the Win32 StretchDIBits() function. The bitmap will be stretched as necessary to fit the specified rectangle.
|
Parameter |
Description |
|
pDC |
Pointer to the display or printer device context that will receive the DIB image. |
|
origin |
CPoint object that holds the logical coordinates at which the DIB will be displayed. |
|
size |
CSize object that represents the display rectangle's width and height in logical units. |
|
Return value |
TRUE if successful. |
|
Table 8. |
|
-
Empty(): This function empties the DIB, freeing allocated memory and closing the map file if necessary.
-
GetDimensions(): This function returns the width and height of a DIB in pixels.
|
Parameter |
Description |
|
Return value |
CSize object |
|
Table 9. |
|
-
GetSizeHeader(): This function returns the number of bytes in the info header and color table combined.
|
Parameter |
Description |
|
Return value |
32-bit integer |
|
Table 10. |
|
-
GetSizeImage(): This function returns the number of bytes in the DIB image (excluding the info header and the color table).
|
Parameter |
Description |
|
Return value |
32-bit integer |
|
Table 11. |
|
-
MakePalette(): If the color table exists, this function reads it and creates a Windows palette. The HPALETTE handle is stored in a data member.
|
Parameter |
Description |
|
Return value |
TRUE if successful |
|
Table 12. |
|
-
Read(): This function reads a DIB from a file into the CDib object. The file must have been successfully opened. If the file is a BMP file, reading starts from the beginning of the file. If the file is a document, reading starts from the current file pointer.
|
Parameter |
Description |
|
pFile |
Pointer to a CFile object; the corresponding disk file contains the DIB. |
|
Return value |
TRUE if successful. |
|
Table 13. |
|
-
ReadSection(): This function reads the info header from a BMP file, calls CreateDIBSection() to allocate image memory, and then reads the image bits from the file into that memory. Use this function if you want to read a DIB from disk and then edit it by calling GDI functions. You can write the DIB back to disk with Write or CopyToMapFile().
|
Parameter |
Description |
|
pFile |
Pointer to a CFile object; the corresponding disk file contains the DIB. |
|
pDC |
Pointer to the display or printer device context. |
|
Return value |
TRUE if successful. |
|
Table 14. |
|
-
Serialize(): The CDib::Serialize function, which overrides the MFC CObject::Serialize function, calls the Read() and Write() member functions. See the Microsoft Foundation Classes and Templates section of the online help for a description of the parameters.
-
SetSystemPalette(): If you have a 16-bpp, 24-bpp, or 32-bpp DIB that doesn't have a color table, you can call this function to create for your CDib object a logical palette that matches the palette returned by the CreateHalftonePalette() function. If your program is running on a 256-color palletized display and you don't call SetSystemPalette(), you'll have no palette at all, and only the 20 standard Windows colors will appear in your DIB.
|
Parameter |
Description |
|
pDC |
Pointer to the display context. |
|
Return value |
TRUE if successful. |
|
Table 15. |
|
-
UsePalette(): This function selects the CDib object's logical palette into the device context and then realizes the palette. The Draw() member function calls UsePalette() prior to painting the DIB.
|
Parameter |
Description |
|
pDC |
Pointer to the display device context for realization. |
|
bBackground |
If this flag is FALSE (the default value) and the application is running in the foreground, Windows realizes the palette as the foreground palette (copies as many colors as possible into the system palette). If this flag is TRUE, Windows realizes the palette as a background palette (maps the logical palette to the system palette as best it can). |
|
Return value |
Number of entries in the logical palette mapped to the system palette. If the function fails, the return value is GDI_ERROR. |
|
Table 16. |
|
-
Write(): This function writes a DIB from the CDib object to a file. The file must have been successfully opened or created.
|
Parameter |
Description |
|
pFile |
Pointer to a CFile object; the DIB will be written to the corresponding disk file. |
|
Return value |
TRUE if successful. |
|
Table 17. |
|
For your convenience, four public data members give you access to the DIB memory and to the DIB section handle. These members should give you a clue about the structure of a CDib object. A CDib is just a bunch of pointers to heap memory. That memory might be owned by the DIB or by someone else. Additional private data members determine whether the CDib class frees the memory.
DIB Display Performance
Optimized DIB processing is now a major feature of Windows. Modern video cards have frame buffers that conform to the standard DIB image format. If you have one of these cards, your programs can take advantage of the new Windows DIB engine, which speeds up the process of drawing directly from DIBs. If you're still running in VGA mode, however, you're out of luck; your programs will still work, but not as fast.
If you're running Windows in 256-color mode, your 8-bpp bitmaps will be drawn very quickly, either with StretchBlt() or with StretchDIBits(). If, however, you are displaying 16-bpp or 24-bpp bitmaps, those drawing functions will be too slow. Your bitmaps will appear more quickly in this situation if you create a separate 8-bbp GDI bitmap and then call StretchBlt(). Of course, you must be careful to realize the correct palette prior to creating the bitmap and prior to drawing it.
Here's some code that you might insert just after loading your CDib object from a BMP file:
// m_hBitmap is a data member of type HBITMAP
// m_dcMem is a memory device context object of class CDC
m_pDib->UsePalette(&dc);
m_hBitmap = m_pDib->CreateBitmap(&dc); // could be slow
::SelectObject(m_dcMem.GetSafeHdc(), m_hBitmap);
Here is the code that you use in place of CDib::Draw in your view's OnDraw member function:
m_pDib->UsePalette(pDC); // could be in palette msg handler
CSize sizeDib = m_pDib->GetDimensions();
pDC->StretchBlt(0, 0, sizeDib.cx, sizeDib.cy, &m_dcMem, 0, 0, sizeToDraw.cx, sizeToDraw.cy, SRCCOPY);
Don't forget to call DeleteObject() for m_hBitmap when you're done with it.
The MYMFC26C Example
Now you'll put the CDib class to work in an application. The MYMFC26C program displays two DIBs, one from a resource and the other loaded from a BMP file that you select at runtime. The program manages the system palette and displays the DIBs correctly on the printer. Compare the MYMFC26C code with the GDI bitmap code in MYMFC26A. Notice that you're not dealing with a memory device context and all the GDI selection rules! Following are the steps to build MYMFC26C.
Run AppWizard to produce \mfcproject\mymfc26C. Accept all the defaults but two: select Single Document and select the CScrollView view base class for CMymfc26CView in step 6. The options and the default class names are shown here.
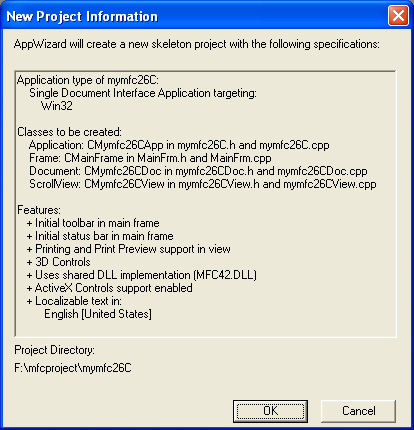
Figure 16: MYMFC26C project summary.
Import the Soap Bubbles bitmap. Choose Resource from Visual C++'s Insert menu. Import Soap Bubbles.bmp from the \WINDOWS directory.
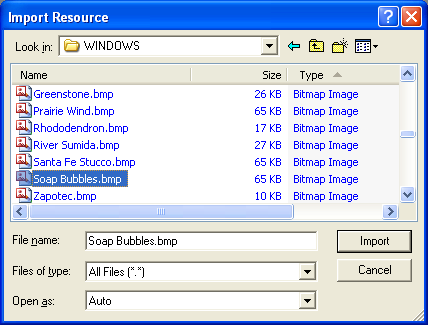
Figure 17: Importing Soap Bubbles.bmp into MYMFC26C project.
Visual C++ will copy this bitmap file into your project's \res subdirectory. Assign IDB_SOAPBUBBLE as the ID, and save the changes.
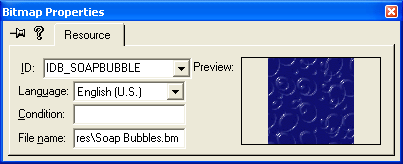
Figure 18: Modifying bitmap properties.
Integrate the CDib class with this project. If you've created this project from scratch, copy the cdib.h and cdib.cpp files to the \mfcproject\mymfc26C directory. Simply copying the files to disk isn't enough; you must also add the CDib files to the project. Choose Add To Project from Visual C++'s Project menu, and then choose Files. Select cdib.h and cdib.cpp, and click the OK button. If you now switch to ClassView in the Workspace window, you will see the class CDib and all of its member variables and functions.
|
Figure 19: Adding header and source files (class) to the project. |

Add two private CDib data members to the class CMymfc26CView. In the ClassView window, right-click the CMymfc26CView class. Choose Add Member Variable from the resulting pop-up menu, and then add the m_dibResource member as shown in the following illustration.
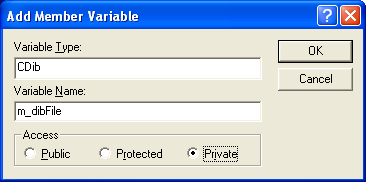
Figure 20: Adding private CDib type data members to the class CMymfc26CView.
Add m_dibFile in the same way. The result should be two data members at the bottom of the header file as shown below:
CDib m_dibFile;
CDib m_dibResource;
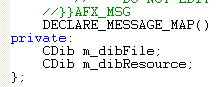
Listing 16.
ClassView also adds the #include statement at the top of the mymfc26CView.h file:
#include "cdib.h" // Added by ClassView

Listing 17.
Edit the OnInitialUpdate() member function in mymfc26CView.cpp. This function sets the mapping mode to MM_HIMETRIC and loads the m_dibResource object directly from the IDB_REDBLOCKS resource. Note that we're not calling LoadBitmap() to load a GDI bitmap as we did in MYMFC26A. The CDib::AttachMemory function connects the object to the resource in your EXE file. Add the following code:
void CMymfc26CView::OnInitialUpdate()
{
CScrollView::OnInitialUpdate();
CSize sizeTotal(30000, 40000); // 30-by-40 cm
CSize sizeLine = CSize(sizeTotal.cx / 100, sizeTotal.cy / 100);
SetScrollSizes(MM_HIMETRIC, sizeTotal, sizeTotal, sizeLine);
LPVOID lpvResource = (LPVOID) ::LoadResource(NULL,
::FindResource(NULL, MAKEINTRESOURCE(IDB_SOAPBUBBLE), RT_BITMAP));
m_dibResource.AttachMemory(lpvResource); // no need for ::LockResource
CClientDC dc(this);
TRACE("bits per pixel = %d\n", dc.GetDeviceCaps(BITSPIXEL));
}

Listing 18.
Edit the OnDraw() member function in the file mymfc26CView.cpp. This code calls CDib::Draw for each of the DIBs. The UsePalette() calls should really be made by message handlers for the WM_QUERYNEWPALETTE and WM_PALETTECHANGED messages. These messages are hard to deal with because they don't go to the view directly, so we'll take a shortcut. Add the following code:
void CMymfc26CView::OnDraw(CDC* pDC)
{
BeginWaitCursor();
m_dibResource.UsePalette(pDC); // should be in palette
m_dibFile.UsePalette(pDC); // message handlers, not here
pDC->TextOut(0, 0,
"Press the left mouse button here to load a file.");
CSize sizeResourceDib = m_dibResource.GetDimensions();
sizeResourceDib.cx *= 30;
sizeResourceDib.cy *= -30;
m_dibResource.Draw(pDC, CPoint(0, -800), sizeResourceDib);
CSize sizeFileDib = m_dibFile.GetDimensions();
sizeFileDib.cx *= 30;
sizeFileDib.cy *= -30;
m_dibFile.Draw(pDC, CPoint(1800, -800), sizeFileDib);
EndWaitCursor();
}
---------------------------------------------------------------------------------------------------------------------------------------------------------
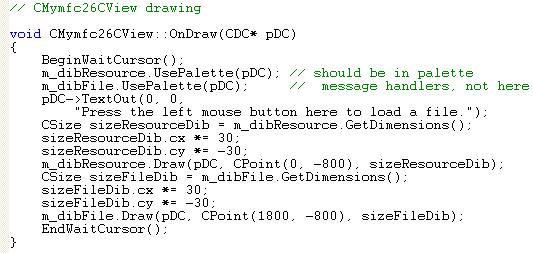
Listing 19.
Map the WM_LBUTTONDOWN message in the CMymfc26CView class. Edit the file mymfc26CView.cpp. OnLButtonDown() contains code to read a DIB in two different ways. If you leave the MEMORY_MAPPED_FILES definition intact, the AttachMapFile() code is activated to read a memory-mapped file. If you comment out the first line, the Read() call is activated. The SetSystemPalette() call is there for DIBs that don't have a color table.
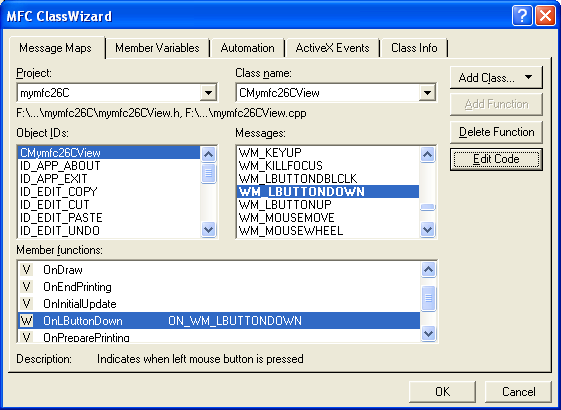
Figure 21: Mapping the WM_LBUTTONDOWN message in the CMymfc26CView class for left mouse button click.
Then, add the following code:
#define MEMORY_MAPPED_FILES
void CMymfc26CView::OnLButtonDown(UINT nFlags, CPoint point)
{
CFileDialog dlg(TRUE, "bmp", "*.bmp");
if (dlg.DoModal() != IDOK) {
return;
}
#ifdef MEMORY_MAPPED_FILES
if (m_dibFile.AttachMapFile(dlg.GetPathName(),
TRUE) == TRUE) { // share
Invalidate();
}
#else
CFile file;
file.Open(dlg.GetPathName(), CFile::modeRead);
if (m_dibFile.Read(&file) == TRUE) {
Invalidate();
}
#endif // MEMORY_MAPPED_FILES
CClientDC dc(this);
m_dibFile.SetSystemPalette(&dc);
}
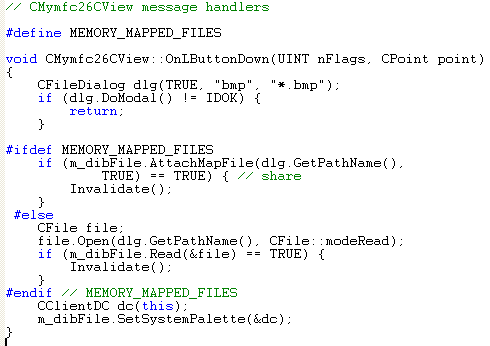
Listing 20.
Build and run the application. Try some other BMP files if you have them. Note that Soap Bubbles is a 16-color DIB that uses standard colors, which are always included in the system palette.
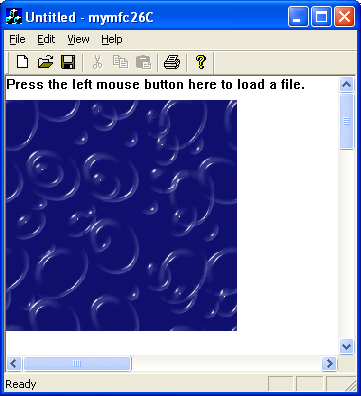
Figure 22: MYMFC26C program output.
Continue on next module...part 5.
Further reading and digging:
-
MSDN What's New (MFC Feature Pack) - feature pack.
-
DCOM at MSDN.
-
COM+ at MSDN.
-
COM at MSDN.
-
Unicode and Multi-byte character set: Story and program examples.