| Tenouk C & C++ | MFC Home | ATL Attributes 1 | C++, MFC, Winsock & WinInet 1 | Download | Site Index |
ATL - Attributes Tutorial on Visual C++ .Net part 2
Program examples compiled using Visual Studio/C++ .Net 2003 compiler on Windows XP Pro machine with Service Pack 2. Topics and sub topics for this tutorial are listed below. Don’t forget to read Tenouk’s small disclaimer. The supplementary note for this tutorial is the early stage of the .NET.
|
Step 4: Adding the Client Object
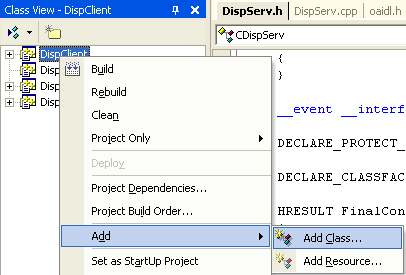
In this step, you will add a client object (named CDispCtl) to the client project. This client object will be implemented by a simple, lightweight control added by the Add Class dialog box.
Adding the client object to the project
Figure 15: Adding a new class to DispClient.
|
-
In the Short name field, type DispCtl. The remaining fields are automatically completed.

Figure 16: ATL Control Wizard, Names page.
-
Click the Options tab.
-
Select Minimal control.
-
Change the Threading Model to Single.
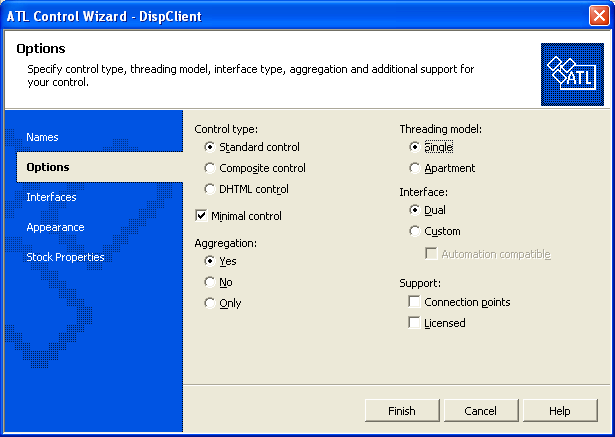
Figure 17: ATL Control Wizard, Options page.
-
Click the Interfaces tab.
-
Move IDataObject and IProvideClassInfo2 to the Supported column.
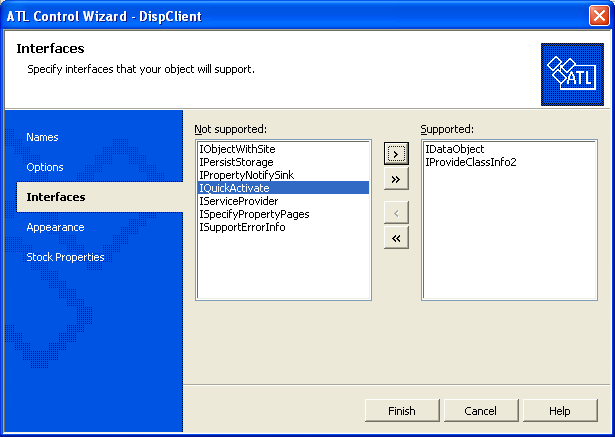
Figure 18: ATL Control Wizard, Interfaces page.
-
Click Finish to generate the CDispCtl class.
CDispCtl inherits from all the ATL template classes required for a light control. Additionally, the class inherits from IDataObjectImp, providing methods to support Uniform Data Transfer, and IProvideClassInfo2Impl, allowing the access of type information for the object's coclass from other COM objects. Registration of the control is achieved using the registration_script attribute. The parameter on this attribute is the name of the registration script, in this case Control.rgs, which is the default registration script for controls.
Also included is a default implementation of the OnDraw() method.
The final step is to add the event_receiver attribute to the new class.
Adding an attribute to an existing class
-
In Class View, double-click the DispClient node and click the CDispCtl class. This will display the class definition for CDispCtl.
-
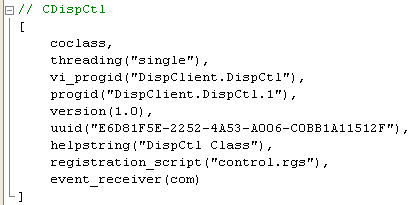
Just above the class definition is the attribute block for the class. Add event_receiver(com) to the attribute block. Don’t forget to put a comma at the end of the previous line of code.
------------------------------------------------------------------------------------------------------
Listing 5.
The resulting attribute list should resemble the following:
[
coclass,
threading("single"),
progid("DispClient.DispCtl"),
version(1.0),
uuid("E26DD5C9-DE30-46FF-B6B6-51F31840B437"),
registration_script("control.rgs"),
event_receiver(com)
]
In the next step, you will add the needed interfaces to the control object.
Step 5: Adding the Client Interfaces
In this step, you will implement the various methods of the IDispCtl interface. To allow the client object to handle events fired from the _IDispServEvents interface you need to allow access to the interface exposed by the CDispServ class.
To allow the client object to handle events
-
Open DispCtl.h in your source editor.
-
Add the following line below the #include <atlctl.h> line:
#import "progid:DispServer.DispServ.1" embedded_idl, no_namespace

Listing 6.
This assumes that your class name is DispServer.
In the last step, we added a simple client object (CDispCtl) with an empty interface to the project. At this point, you need to add the following methods to the IDispCtl interface:
-
Connect() - Causes the client to hook to the server, enabling it to receive events.
-
Disconnect() - Unhooks the event source of the client.
-
Send() - Sends the specified data to the server.
To add the methods to your interface
-
In Class View, double-click the IDispCtl node under the DispClient project.
-
In the Source editor, add the following lines to the IDispCtl interface:
[id(1), helpstring("method Connect")] HRESULT Connect();
[id(2), helpstring("method Disconnect")] HRESULT Disconnect();
[id(3), helpstring("method Send")] HRESULT Send(VARIANT data);

Listing 7.
The interface should now resemble the following code:
[
object,
uuid(...),
dual,
helpstring("IDispCtl Interface"),
pointer_default(unique)
]
__interface IDispCtl : IDispatch
{
[id(1), helpstring("method Connect")] HRESULT Connect();
[id(2), helpstring("method Disconnect")] HRESULT Disconnect();
[id(3), helpstring("method Send")] HRESULT Send(VARIANT data);
};
In the next step, you will add the implementation of the IDispCtl methods and modify other sections of code.
Step 6: Implementing the Client
In this step, you will implement IDispCtl's methods in CDispCtl, add an event handler, and modify the OnDraw() function.
Implementing the IDispCtl Interface
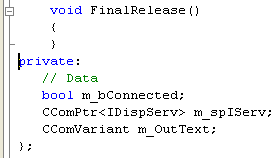
CDispCtl is where you will implement methods declared in IDispCtl. The implementation begins with adding the following three data members, used by the new methods:
-
m_bConnected(bool) - Indicates the connect state of the server.
-
m_pIServ(_IDispServEvents*) - A pointer to the IDispServ interface the client will connect to.
-
m_OutText(variant) - Holds the data received from the server.
To add the data members
-
In Class View, double-click the IDispCtl node under the DispClient project.
-
In the Source editor, add the following lines at the end of the CDispCtl class, in a private: section:
private:
// Data
bool m_bConnected;
CComPtr<IDispServ> m_spIServ;
CComVariant m_OutText;
Listing 8.
-
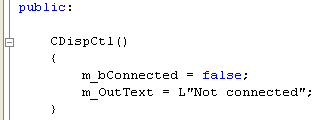
To initialize the new data members, modify the default constructor to match the following:
CDispCtl()
{
m_bConnected = false;
m_OutText = L"Not connected";
}
Listing 9.
-
To ensure that you disconnect from the server upon exiting, add a destructor for the CDispCtl class. Add the following directly below the default constructor declaration:
~CDispCtl()
{
Disconnect();
}

Listing 10.
The first method you will implement is the Connect() method. This method creates an instance of CDispServ using CoCreateInstance() and connects the Transfer() event from the newly created instance of CDispServ to the event handler method, OnTransmit() (not yet implemented). The connection is achieved by the __hook keyword.
To implement the Connect() method
Below the data members created earlier, add the following code:
HRESULT Connect()
{
HRESULT hr;
hr = m_spIServ.CoCreateInstance(__uuidof(CDispServ));
if (SUCCEEDED(hr))
{
hr = __hook(&_IDispServEvents::Transfer, m_spIServ, CDispCtl::OnTransmit);
}
if (hr == S_OK)
{
m_bConnected = true;
m_OutText = L"Connected";
}
FireViewChange();
return(hr);
}
 |
Listing 11.
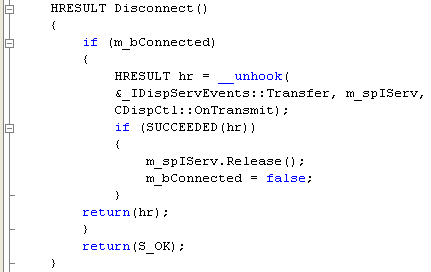
The implementation of the Disconnect() method uses __unhook to disconnect the event and Release() to release the instance of CDispServ created earlier.
To implement the Disconnect() method
Below the Connect() method, add the following code directly:
HRESULT Disconnect()
{
if (m_bConnected)
{
HRESULT hr = __unhook(&_IDispServEvents::Transfer, m_spIServ,CDispCtl::OnTransmit);
if (SUCCEEDED(hr))
{
m_spIServ.Release();
m_bConnected = false;
}
return(hr);
}
return(S_OK);
}
Listing 12.
Adding the Event Handler
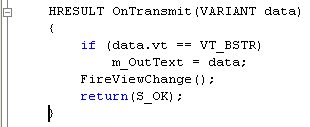
For the control to respond to events fired from the server, you need to implement a handler (called OnTransmit()) for the Transmit() event. The OnTransmit() event handler takes the data passed in from the Transfer() event and places it in the m_OutText data member. It then calls FireViewChange() (not yet implemented), which updates the control by displaying the contents of the m_OutText data member.
To implement a handler for the Transmit event
Add the following code to the source file, below Disconnect():
HRESULT OnTransmit(VARIANT data)
{
if (data.vt == VT_BSTR)
m_OutText = data;
FireViewChange();
return(S_OK);
}
Listing 13.
The last method you will implement is the Send() method. This method sends data to the server object.
To implement the Send() method
Add the following code to the source file, below OnTransmit():
HRESULT Send(VARIANT data)
{
if (m_bConnected)
m_spIServ->Send(data);
return(S_OK);
}
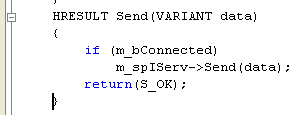
Listing 14.
Modifying the OnDraw() Method
The final modification you will make is to the CDispCtl::OnDraw method. The OnDraw() method needs to output the contents of the data member m_OutText to the screen.
To modify the OnDraw() method
Replace the body of the existing OnDraw() method with the following:
USES_CONVERSION;
LPCTSTR text = OLE2CT(m_OutText.bstrVal);
RECT& rc = *(RECT*)di.prcBounds;
Rectangle(di.hdcDraw, rc.left, rc.top, rc.right, rc.bottom);
SetTextAlign(di.hdcDraw, TA_CENTER|TA_BASELINE);
TextOut(di.hdcDraw,
(rc.left + rc.right) / 2,
(rc.top + rc.bottom) / 2,
text,
lstrlen(text));
return S_OK;
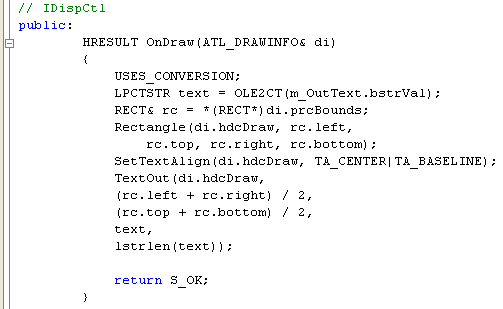
Listing 15.
The DispClient control is now complete. Build the control by selecting Build DispClient from the Build menu.
Step 7: Using the Client Control
In this step, you will use the client control to invoke the methods.
To use the client control
-
On the Tools menu, click ActiveX Control Test Container. This starts Tstcon32.exe.
-
Click the New Control button on the toolbar to insert a client controls (CDispCtl).

Figure 19: Inserting new control to ActiveX Control Test Container.
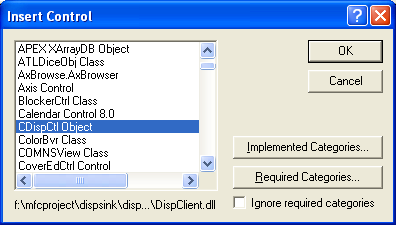
Figure 20: Selecting control in ActiveX Control Test Container.
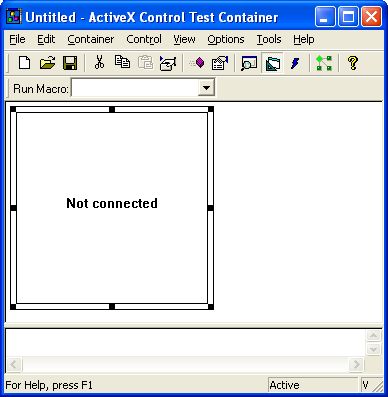
Figure 21: CDispCtl object in ActiveX Control Test Container.
-
Right-click the control and click Invoke Method on the shortcut menu. The Invoke Method dialog box appears.
-
Ensure that Method Name is set to Connect and click Invoke.
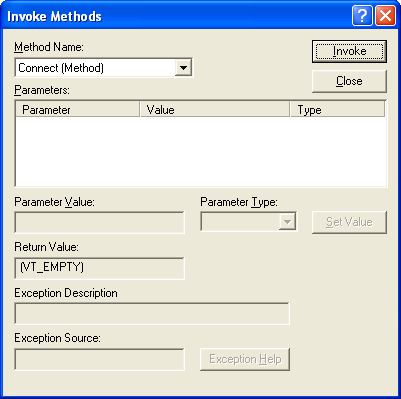
Figure 22: Invoking the Connect() method of the CDispCtl control in ActiveX Control Test Container.
-
Right-click the control and click Invoke Method on the shortcut menu. The Invoke Method dialog box appears.
-
Set Method Name to Send.
-
Change the parameter type on the Send method to VT_BSTR.
-
Enter any string in the Parameter Value box.
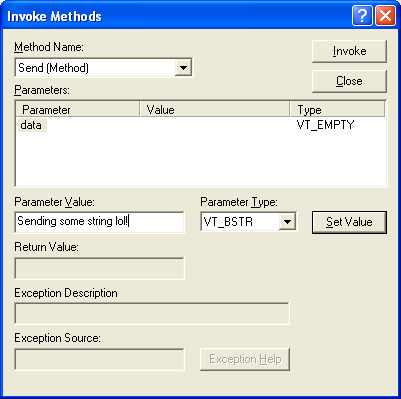
Figure 23: Invoking the Send() method of the CDispCtl control in ActiveX Control Test Container.
-
Click the Invoke button. The string is displayed in all connected controls.
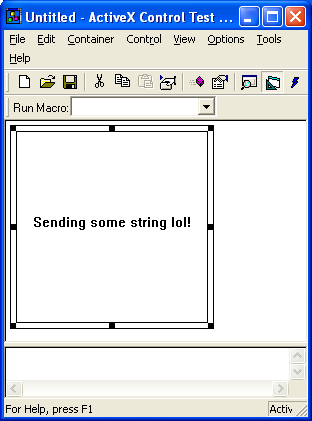
Figure 24: CDispCtl in action.
--------------End-----------
Further reading and digging:
-
MSDN MFC 9.0 class library online documentation - latest version.
-
DCOM at MSDN.
-
COM+ at MSDN.
-
COM at MSDN.
-
Unicode and Multi-byte character set: Story and program examples.